Tutorial: Web APIs with Revit and Python
Intro
This past June I had the opportunity to present a couple of talks at the DBEI (Digital Built Environment Institute) Digital Built Week conference. One of the talks was a workshop on how to connect data in Revit to the web using Python (via pyRevit). In the workshop I demonstrated this capability using the Airtable API, which is easy-to-use and well-documented. All of the files for the tutorial are available on my Github page. Additionally, on Github you can find a PDF of the handout that was used for the tutorial, which goes through the step-by-step process for setting everything up and developing the code. Since the PDF already provides detailed instructions, I will use this blog post to give a condensed version of the tutorial rather than simply repeat what’s in the PDF.
Workflow Overview
The task outlined in this particular workflow was to create a database of materials using Airtable. Each of our materials will be an Airtable ‘record’ that contains some material properties that we will end up pushing/pulling to/from Revit. For anyone who has tried to manage materials directly inside Revit, you probably know how much it sucks, and why you might want to externalize this. Additionally, there are often material properties that we might want to track such as manufacturing data, which doesn’t need to live in the documentation model – and so having a separate space for tracking this provides additional benefits beyond avoiding Revit.
The use of Airtable with Revit is of course not limited to serving as a materials database. While this is one example of a use case (one that I’ve found to be very useful in practice), there are plenty of other use cases given the flexibility of Airtable. A couple other example use cases might be creating a feature request form for a set of pyRevit tools that feeds an Airtable base, and developing a dynamic mapping of custom parameters as company standards may change over time.
Step 1: Setup of Revit File and pyRevit
The Revit file used in the tutorial can be found on Github, and will come with the custom material parameters already built-in. That said, I’ll briefly review what has been setup here.
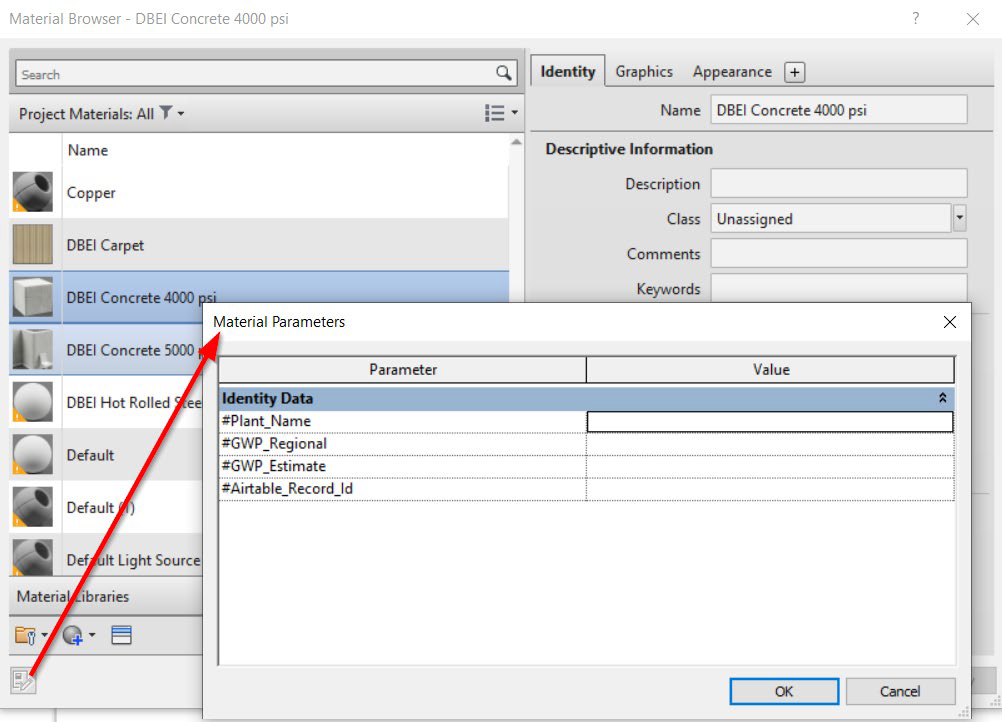
In the Revit project we will define some custom materials as well as create some custom material properties. The following custom material properties have been setup in the project.
- #Plant_Name – This will store the name of the manufacturing plant
- #GWP_Region – This will store the our regional baseline GWP values
- #GWP_Estimate – This will store our estimated GWP values
- #Airtable_Record_Id – This will store our Airtable record ids

I won’t go into detail here about pyRevit since there are many great resources out there for getting setup with it (some of which are linked to in the PDF). In short, as described on their website, “pyRevit (with lowercase py) is a Rapid Application Prototyping (RAD) environment for Autodesk Revit®. It helps you quickly sketch out your automation and add-on ideas, in whichever language that you are most comfortable with, inside the Revit environment and using its APIs. It also ships with an extensive set of powerful tools that showcase its capabilities as a development environment.”
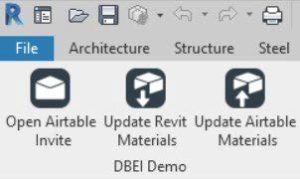
In this workflow we setup a custom pyRevit extension that has the tools that we will be developing. We created separate buttons for each of the tools: ‘Update Revit Materials’ and ‘Update Airtable Materials’. For convenience of launching the Airtable base to be copied, I’ve also added a button that launches an invite to the base.

Step 2: Airtable Access and Setup
Airtable is an easy-to-use online platform used for setting up lightweight relational databases. Since it’s a flexible tool with a well-documented API, it’s a nice tool for the purposes of demonstrating how to work with web APIs.
An Airtable base was setup for this tutorial that can be found here. Or you can feel free to build your own. If working off of the pre-built one, make sure you duplicate the base prior to proceeding. Once you’ve got your own version of an Airtable base you will need two things for Authentication: a Base ID (specific to the base), and a Personal Access Token (previously this was an API Key, but both behave almost the same for our purposes).
You can find your base id by going to ‘Help’ at the upper right, and then ‘API documentation’ at the lower right. This will launch the very helpful documentation page where you can find the base id. It should look something like this: appEI85lJokRABCDE
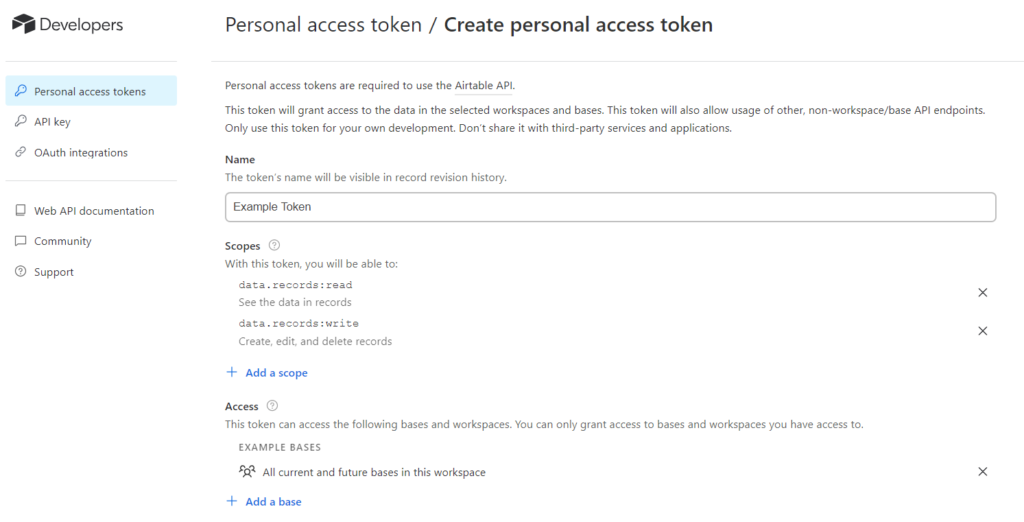
To find/make your Personal Access Token, go to the Developer Hub by clicking the user icon in the upper right and hitting ‘Developer hub’. Next, go to ‘Personal access tokens’ on the left-hand side of the page, and follow the instructions to generate a token. For the functionality demonstrated in this tutorial you will need to include ‘data.records.read’ and ‘data.records.write’ in your ‘Scopes’, and make sure that the token you create has access to the base we are using.

The base that has been setup for this demo consists of two tables: ‘Project Info’ and ‘Materials’. The ‘Project Info’ table will store our general Project Region and our Project Phase. These are both Single Selection fields that will allow us to switch between regions and project phases. Based on the values selected for these fields, the values of some of the fields in the Materials table will be altered. This is to highlight the relational aspect of Airtable bases.

The second table, titled ‘Materials’ is where we will store our material “records”. Each record represents a unique material, and we’ve defined a number of properties for each material

One of the many powerful features in Airtable is the ability to link to records in other tables and lookup data belonging to that record. In our case we’ve linked our materials to the ‘DBEI Demo’ project record, and are doing lookups into the ‘Project Region’ and ‘Project Phase’ fields of those project records.
Step 3: Scripting the Tools
We will be building two tools, one which will pull some data from Airtable to Revit, and one that will update Airtable records from Revit. Since both of these tools will be accessing the same Airtable base, we’ll keep some of the references in a separate file, and we’ll import the variables into each tool as required.
my_airtable.py
This short Python script contains info that is required in both of our tools. Placing it once here will save us some repetition between scripts. Here is where we will paste in our API Key and Base Ids that we generated in previous steps.
import posixpath

BASE_ID = "app7GoC6paABCDEFG" # This is a fake base id. Replace this with your own base id once you have it
AIRTABLE_API_KEY = "key7cmK9j2ABCDEFG" # This is a fake key, you need to get your own from airtable
TABLE_NAME = "Materials"

VERSION = "v0"
API_BASE_URL = "https://api.airtable.com/"

url = posixpath.join(API_BASE_URL, VERSION, BASE_ID, TABLE_NAME)
The complete version of this file (found on github) will also store the functions for our GET and PATCH requests. I wound up providing examples with and without using the Python requests library that ships with pyRevit. The reason for this is that there may be some cases where the requests library doesn’t work on virtual machines or due to antivirus software, etc. You should only need to use one of the two.
Below is an example GET request function using the Python requests library (For this demo we will keep things simple and just return all the records. Often when making a GET request you will also pass additional parameters in order to filter what is returned) :
def get_request_requests(request_url):
    '''
    Make a get request using Python requests module
    '''
    headers = {"Authorization": "Bearer {}".format(AIRTABLE_API_KEY)}
    response = requests.get(request_url, headers=headers)
    json_response = response.json()

    return json_response
update_rev_mat_script.py
This is the script that will update Revit materials based on changes in Airtable. This Python script will comprise of three general steps:
- Collect all the records from the Airtable ‘Materials’ table (using the GET request function)
- Ask the user what materials they would like to update
- Collect and update the desired materials in Revit.
{
    "id": "rec2iGnr1dHEcKiz7",
    "fields": {
        "#Material Plant": "Sizzle Steelworks",
        "GWP National Average": "0.65",
        "Assigned Regional GWP": "0.60",
        "GWP Units": "kgCO2e/lb",
        "Material Name": "DBEI Hot Rolled Steel",
        "GWP Specified": 0.57999999999999996,
        "Project Region": ["Western"],
        "#GWP Regional Baseline": "0.60 kgCO2e/lb",
        "#GWP Conservative Estimate": "0.73 kgCO2e/lb",
        "GWP East Baseline": "0.65",
        "GWP Central Baseline": "0.75",
        "lookup": ["rec0CYXo29GoJuY7R"],
        "GWP West Baseline": "0.60",
        "GWP Specified Plus Uncertainty": 0.72499999999999998,
        "Project Phase": ["Conceptual Design"],
        "GWP CLF Baseline": "0.771 kgCO2e/lb"
    },
    "createdTime": "2023-05-21T04: 43: 19.000Z"
}
This script defines a function called process_records that will take the list of Airtable records (like the one above) and strip them down to the relevant info in the format we desire. The returned dictionary should look something like what we see below. This has just the properties that we will attempt to update in Revit. Note that we’ve stored the Airtable Record Id as a property. This may feel a bit odd now, but this will help us in the next tool we build when we want to update the records.
{
    "DBEI Carpet": {
        "Airtable Id": "recVEw0v20PY1arWP",
        "#GWP Conservative Estimate": "1.85 kgCO2e/ft2",
        "#GWP Regional Baseline": "1.45 kgCO2e/ft2",
        "#Material Plant": "Snuggle Strands"
    },
    "DBEI Concrete 5000 psi": {
        "Airtable Id": "recUJVyjxCveh4FiP",
        "#GWP Conservative Estimate": "331.88 kgCO2e/yd3",
        "#GWP Regional Baseline": "290 kgCO2e/yd3",
        "#Material Plant": "Mix-a-lot Concrete"
    }
}
The remaining steps of the script include using a built-in pyRevit form to ask the user which materials from the dictionary we got from the process_records function we would like to update. Once we have this, we collect those materials from the active document and update their properties.
update_air_mat_script.py
This script is the one in which we will update Airtable materials from Revit. You may want this in the case that users are changing material properties in Revit, and you want to capture those changes in your database. This script is very much like the previous one in reverse. It’s steps will include:
- Collect materials in Revit that have Airtable Ids specified
- Ask the user what materials they would like to update in Airtable
- Update the matching Airtable record
def update_records(url, record_dict):
    '''
    Places a PATCH request in order to update
    existing records in Airtable
    '''
    for id, data in record_dict.items():
        record_url = posixpath.join(url, id)
        fields_dict = {"fields" : {"#Comments": data}} #updates the Comments parameter in our demo)

        #PATCH REQUEST USING REQUESTS MODULE
        #(function imported from my_airtable.py)
        patch_request_requests(record_url, fields_dict)
Step 4: Running the Tools
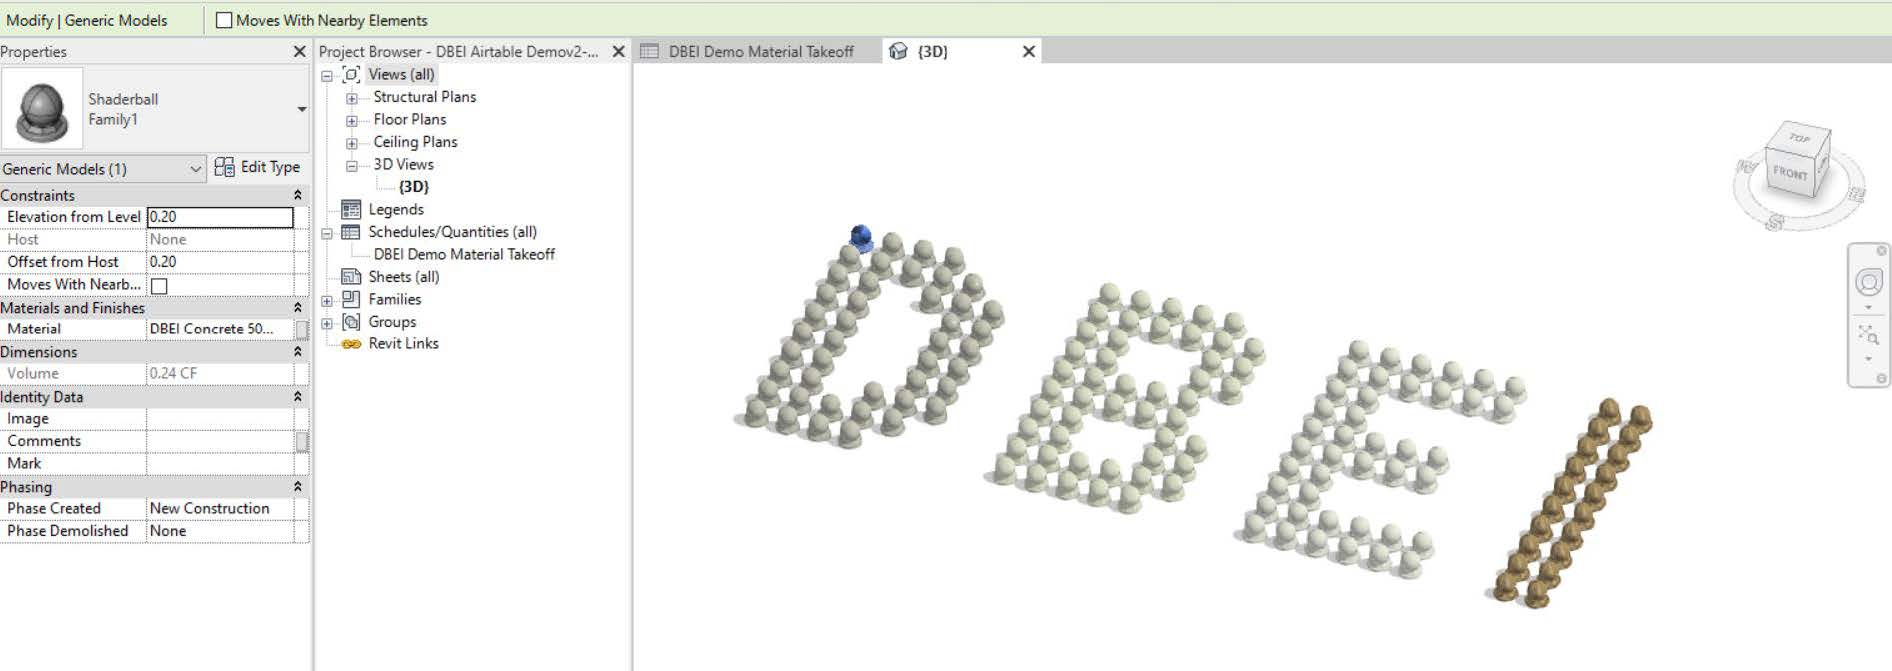
To test if things are working as expected, run the ‘Update Revit Materials’ tool. We should see the schedule populate as seen below (values may vary depending on the Project Info you setup).

Now let’s demonstrate the power of Airtable’s relational databases. Go in and change the Project Region and/or the Project Phase in the ‘Project Info’ table. Now run the ‘Update Revit Materials’ tool once more, and you should see all of the GWP numbers update. This demonstrates that a simple change of one or two pieces of data in Airtable can quickly allow us to update many more properties in Revit at the click of a button.
To test out the ability to update Airtable from Revit, go ahead and fill in some values for the Comments in all or some of the materials directly in the Revit schedule. Open the Materials table in Airtable and scroll over to the #Comments field to watch it update in real time. Now, click the ‘Update Airtable Materials’ button and check all the materials we added comments to. You should see the comments populate in Airtable.
Conclusion
As mentioned, this post is really meant to be a condensed version of the full workshop, but hopefully it provides an overview of what’s possible and the main steps. There’s plenty of improvements we can make to the code in order to make it more robust. Our tools currently assume a lot of things such as parameters existing in the model, a fairly small number of records we’re working with, and that the tools are run in a specific order. These are things we’d want to better address if we were to deploy these tools within a firm. These types of things can be handled with further checks in the code and by leveraging other resources such as pyAirtable to provide more comprehensive handling of the Airtable API. Additionally, many of the things covered throughout this tutorial are not unique to working within Revit, and can be leveraged in a variety of platforms. Happy coding!
